Meredith has been my trainer at the gym for 8 months now. She is leaving and returning to PEI where she is from to do work, that is more in her field.
My gift to her is a box of all purpose cards. I found the directions for this very easy box here.
I know she is going love them, I do!
Monday, May 17, 2010
Saturday, May 08, 2010
Beatriz's Birthday Book
I spent a few days putting this book together for my good friend Beatriz. I got the idea from Laura at Follow The Paper Trail. She makes some incredible books. I was watching her create an amazing book one night on Ustream, and when I saw the papers she was using I realized that I had some of the same ones. So that gave me inspiration and I set to work at making my friend's book.
Front Cover
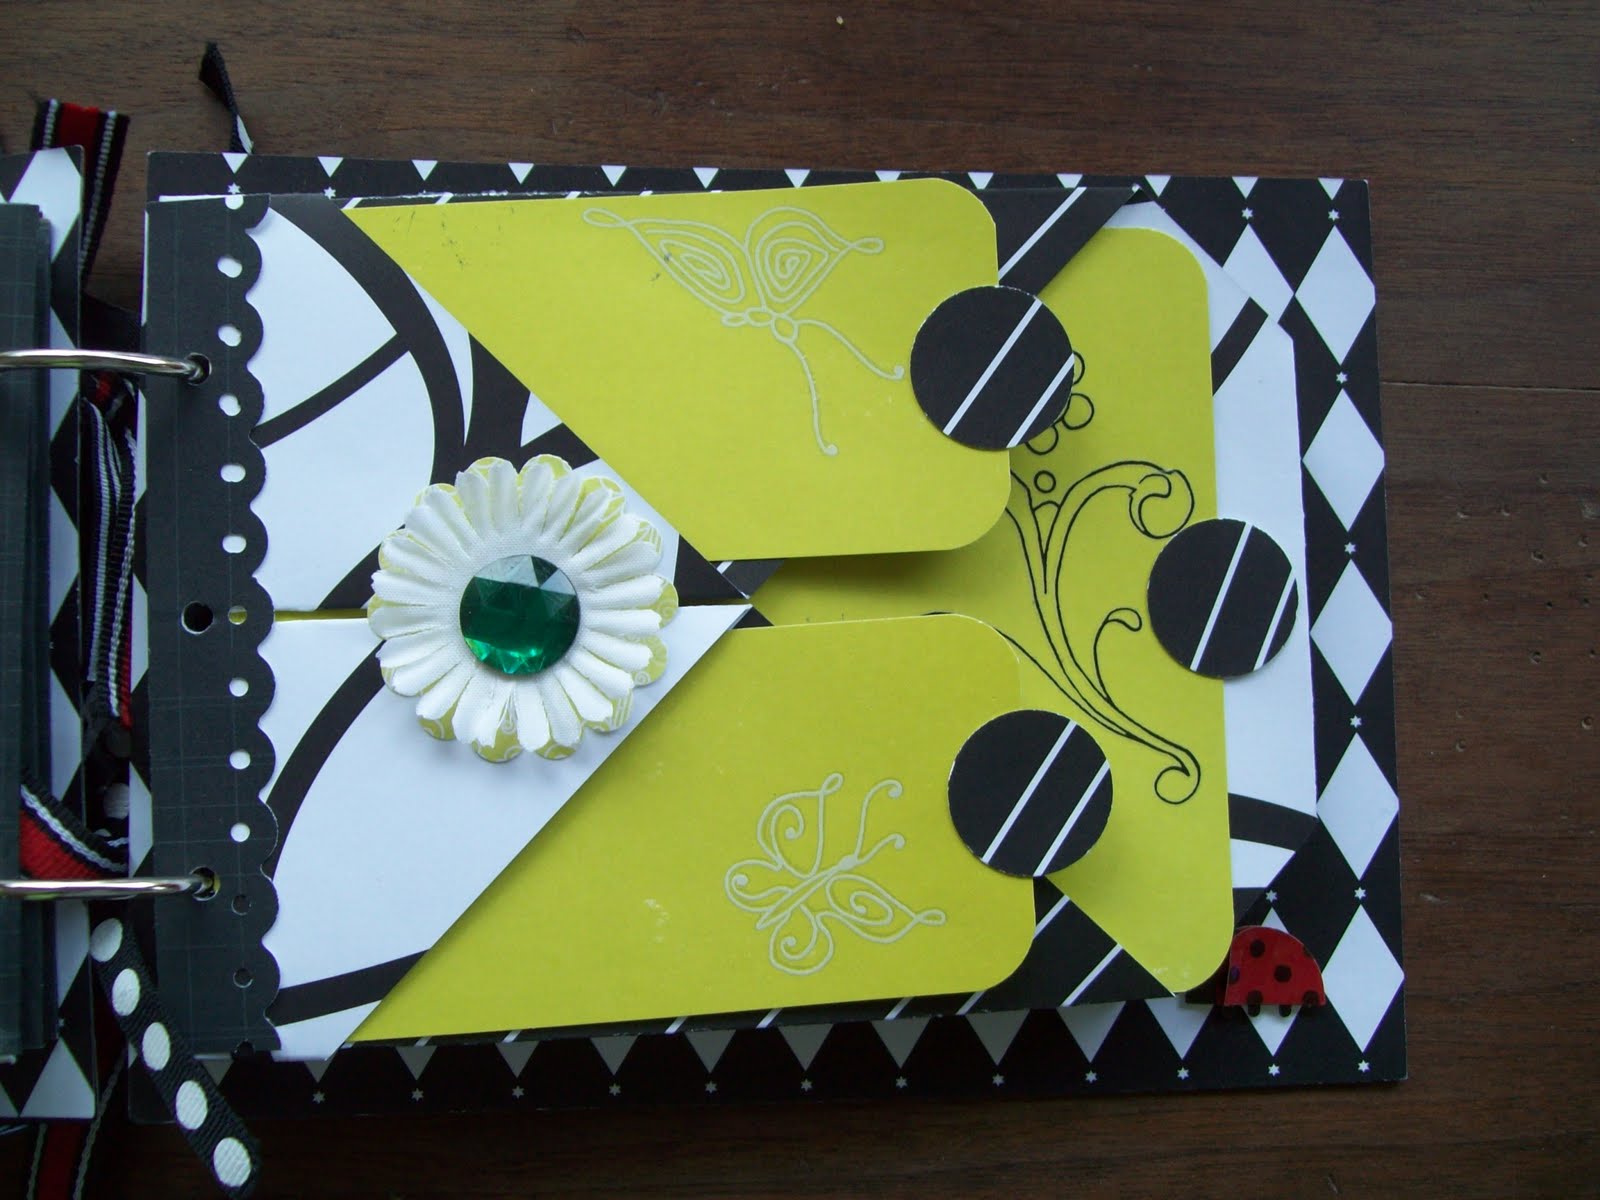
Inside front cover. I used my Cricut and the Home Decor cartridge for this page.
There are 2 small tags and one large one. I used rub-ons here. The pulls are pink plastic discs I found ages ago at the dollar store to which I added pink jewel brads.
Here you can see I have pulled the large tag out. A photo will fit on the back of this tag.
This is the back of the first page. This is a large tag where a photo can be added on the back side.
The 2nd page again has rub-ons.
Another tag at the back.
I love the paper I used in this book. The pulls here are felt flowers that I found at the dollar store.
The back had this lovely design on the paper.
The 4th page has this green double sided paper and I used both black and white rub-ons.
This is the other side of that green paper, gorgeous.
The 5th page again has black rub-ons. I also had some glass marbles that I used on a few pages.
I used a few plain white cardstock pieces so that it isn't too busy.
There is a transparency that says Giggle attached to this large tag.
The back of the last page.
The inside of the back cover, again I used my Cricut.
The back of the book.
You may have noticed that there is an empty hole in the middle of the binding, that is because I only had 2 binding rings that fit this book. I didn't realize it was going to be this thick, so as soon as I get another one I will add it to the book, along with the ribbons that are waiting here!
The papers are from Luxe Designs and Rouge De Garance. I got them in a kit way back in July 2007 from Scraptivity
Beatriz loved this book. It is a very special book for a very special friend.
Sunday, May 02, 2010
Challenge #12
Make a scrapbook page, card, or other project using an animal or critter.
I used the Everyday Paper Dolls cartridge to cut out this butterfly. I found some great scrap background patterned paper, and put together this 'Happiness' card.
Challenge #11
Make a project using 1 or all of the colors of the rainbow (red, orange, yellow, green, blue)
I went through my scraps to find a piece of rainbow patterned paper, and came up with this one. I added some flowers, sequins and ribbon then to finish it off I added this unusual stamp.
Saturday, May 01, 2010
Challenge #10
Make a project using flowers or something Springy!!
I'm not a fan of flowers, so it is always a challenge for me to use them.
I stamped these beautiful flowers and added a leaf stamp and drew in the stems.
I'm not a fan of flowers, so it is always a challenge for me to use them.
I stamped these beautiful flowers and added a leaf stamp and drew in the stems.
Challenge #9
Make a shaped card, shaped scrapbook page, or shaped project!
I spent a long time thinking about this one. I seldom make shaped cards, although I have often thought circular cards would look really cute. So here is my attempt at a shaped card.
Challenge #8
Make something using monochromatic (which means only 1 color with a neutral color) and add a flower!
I had fun with this one, but initially I forgot to add the flower, so I had to figure out a way to add it afterward. I added two brads in the bottom left corner. I think they look okay there, although I was considering using the brads for the eyes, but that would take all the fun away!
Challenge #7
Make something for a "Dad" or guy in your life. It does not have to be for Father's Day but try to make it masculine.
So far this has been the most challenging! I made my dad's Father's Day card already and I'm just not good at masculine!!
So then I thought I'd do a layout, but I always forget how time consuming they are, even when I think it's just a simple layout. I over think it EVERY time.
This was my dad's pride and joy for 15 years. He was so sad when he had to have it put down because of cancer.
So far this has been the most challenging! I made my dad's Father's Day card already and I'm just not good at masculine!!
So then I thought I'd do a layout, but I always forget how time consuming they are, even when I think it's just a simple layout. I over think it EVERY time.
This was my dad's pride and joy for 15 years. He was so sad when he had to have it put down because of cancer.
Challenge #6
Make something WITH a child or for a child.
There are no children around so I made something for a child. I found a video last week showing how to make a little bag out of a single 12 x 12 sheet of paper, origami style. So here is my attempt, I made 2 because the first one ended up with the pattern inside instead of out. The bag contains a ruler, an eraser, a pencil, a pen and a heart stamp.
Challenge #5
Create something for Teacher Appreciation Week OR for someone you appreciate.
Since I work in a school, there are many occasions when I need a "Thanks you" card, either for students, their parents or perhaps even a staff member. So I made a set of Thank You cards. I will likely add more to the set, having only made 4, for the time constraints. I love the tiny little box, (although it's still bigger than the previous shirt box!)
Challenge #4
Make a project using your least favorite or least used cartridge.
This was a pretty easy choice for me. I had seen all the great boxes that people were making and I longed for Tag, Bag, Boxes and More. When I got it, I quickly realised that it works better if you have a Cricut Expression. I have the little one that only takes 6x12 paper, so the boxes are way too small for anything. Also I seldom ust the Blackletter cartridge, just not a fan of the font, but it came with my Cricut, so I figured I should use something from that one too. It looks nice, but when you consider I cut this at it's biggest, the shirt box came out at 4" x 4 1/2" and only 1/2" high. I don't think my shirt will fit in there!!
Challenge#3
Think Outside the Box. Do something on your scrapbook page, card, or other item that you wouldn't normally do.
Well here is mine. It is an anniversary card for my sister and her husband, they are celebrating their 25th wedding anniversary May 4. It's funny I still think of her as my baby sister!
So I used gift wrap that is embossed, and I also glued beads onto the card. It is a pretty simple card, but I think the white and silver make it look classic.
Well here is mine. It is an anniversary card for my sister and her husband, they are celebrating their 25th wedding anniversary May 4. It's funny I still think of her as my baby sister!
So I used gift wrap that is embossed, and I also glued beads onto the card. It is a pretty simple card, but I think the white and silver make it look classic.
Challenge #2
Again from My Pink Stamper, the challenge is to use up scraps. I decided to use just what was on my workspace. I made a beautiful mini album for my friend Beatriz's birthday yesterday, and one of the pieces was cut out at the wrong size, so I decided to make the focal point of the next card. Here is a card that can be used to congratulate someone on just about anything!
National Scrapbook Day
Today is National Scrapbook Day, but I am celebrating all the weekend. There are a number of challenges online today, so I may pick one particular website or try a bunch of them.
My first challenge was from My Pink Stamper, and the challenge was to create a layout or card with your mother in mind. I wanted to make a card, but since my mum died 6 years ago, and Mothers Day in England has already been celebrated in March, I would make a card for my sister. She has supported me in anything I do, so even though she is younger than me, she is a mother figure for me.
Monday, April 26, 2010
Flowers
I was reading Card of the week.com and discovered another way of making those lovely paper flowers. I have seen Christina make them on her blog but this one instructs you to separate the card stock into two after breaking down the fibers. So instead of 1 flower you get 2.
It looked so pretty when I tried it, I wanted to post it here. No idea yet what I will do with them.
Happy Birthday Beatriz
Due to reasons beyond my control I am not working at the present time. So I have tried to keep busy with some paper crafts, exercising, walking and catching up with appointments.
My very good friend Beatriz is celebrating her birthday at the end of the week, and I wanted to make a card that shows her how important she is to me. I found this stamp set on one of my many road trips with Keitha. I thought it had a really good message.
Thanks to Dawn for the tutorial.
My very good friend Beatriz is celebrating her birthday at the end of the week, and I wanted to make a card that shows her how important she is to me. I found this stamp set on one of my many road trips with Keitha. I thought it had a really good message.
Thanks to Dawn for the tutorial.
Sunday, April 25, 2010
Father's Day
I thought I'd get a head start with my Father's Day card this year. It is over a month away, but always good to get started early.
I got this idea from another card maker Brian, but made some changes to his original design.
This is the card, it is actually a mini album.
It has a belly band that keeps the card closed.
Here the album is opened up to reveal 3 photo mats
And here the photo mats have opened up to reveal photos and journaling.
I could have added photos on the closed mats, but I didn't have the right photos. Most of the pictures of my dad include my mum, and he is still heart broken about her death 5 years ago, that anytime I include Mum's picture, he gets very upset,so I don't add her any more.
The measurements are as follows:
Base strip 12" x 4" scored at 2", 5 3/8" and 8 3/4".
3 strips 7 1/2" x 3" scored at 3 3/4"
4 photo mats 3 1/2" x 2 3/4"
Belly Band 7 1/2" x 1 1/4" and 7 1/2" x 3/4"
The tag on top is 3 1/2" x 2 1/2"
I used my SCAL and my die cutting machine to make the word DAD, welded it and cut it and the background out.
Really easy, so give it a try. If you have any questions or messages, please leave a comment.
I got this idea from another card maker Brian, but made some changes to his original design.
This is the card, it is actually a mini album.
It has a belly band that keeps the card closed.
Here the album is opened up to reveal 3 photo mats
And here the photo mats have opened up to reveal photos and journaling.
I could have added photos on the closed mats, but I didn't have the right photos. Most of the pictures of my dad include my mum, and he is still heart broken about her death 5 years ago, that anytime I include Mum's picture, he gets very upset,so I don't add her any more.
The measurements are as follows:
Base strip 12" x 4" scored at 2", 5 3/8" and 8 3/4".
3 strips 7 1/2" x 3" scored at 3 3/4"
4 photo mats 3 1/2" x 2 3/4"
Belly Band 7 1/2" x 1 1/4" and 7 1/2" x 3/4"
The tag on top is 3 1/2" x 2 1/2"
I used my SCAL and my die cutting machine to make the word DAD, welded it and cut it and the background out.
Really easy, so give it a try. If you have any questions or messages, please leave a comment.
Sunday, April 18, 2010
March Layout
I just realized that I haven't posted this layout. I am trying my best to get one a month done, (how sad is that!) as I am participating in the Project 12 with Scrapbooks and Cards Today magazine and Davinie.
So here it is:
So here it is:
Sunday, April 11, 2010
Check out this blog
I found a new blog that is very helpful in the making of cards. My son bought me Sure Cuts a Lot for Christmas, and I can use images online to make cuts on my machine. This blog that I found offers a whole bunch of very cool images and cards that I can use for free.
I thought I'd give it a try to see how it turns out. So here is the card cut from Wanda
It turned out pretty cool. I'm giving this card to my friend Ildiko this afternoon.
I also found another cut but I can't remember where I downloaded it from, and I tried that one out too.
I thought I'd give it a try to see how it turns out. So here is the card cut from Wanda
It turned out pretty cool. I'm giving this card to my friend Ildiko this afternoon.
I also found another cut but I can't remember where I downloaded it from, and I tried that one out too.
Subscribe to:
Posts (Atom)